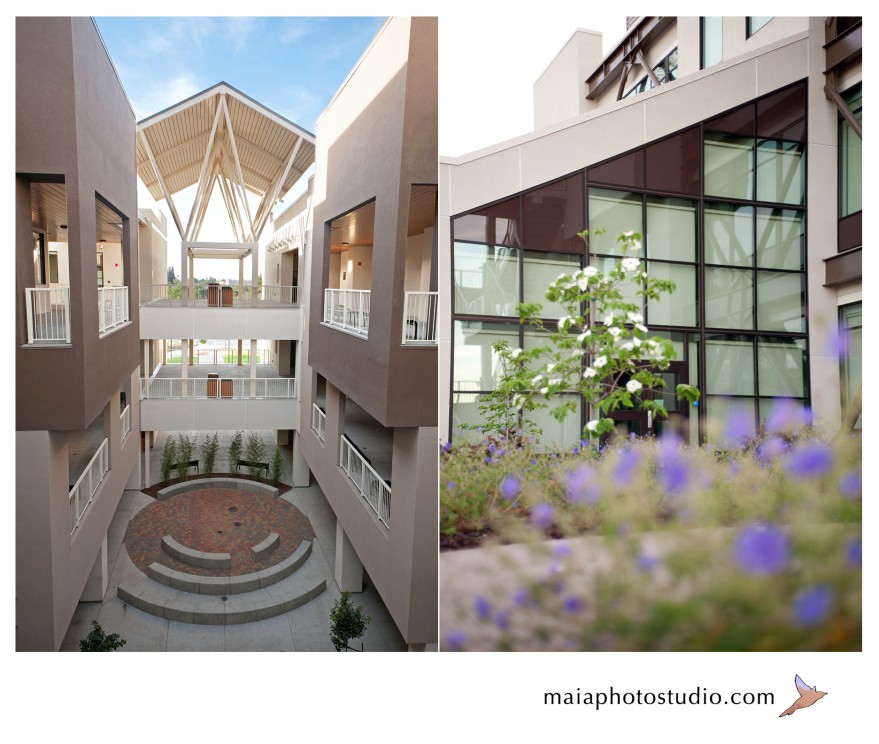
Behind the lens again!

If you’ve been following my posts you’ll know that this past year has been very productive, if not very visible, for me. I’ve been working behind the scenes as a digital retoucher … read: photoshop geek. It’s great fun. I work for a variety of clients doing so many different types of photoshop work that it would be impossible to get bored. But, I’ve been missing something …

This month, I was pleased to add a large construction firm to my client list.

The best part, I get to be BEHIND the camera!

kitchell_fb_4kitchell_fb_3kitchell_fb_1 kitchell_fb_2   kitchell_fb_5

Ask a photog – Travel tips for photogs.

It’s summer time; let the cheering & chair-dancing begin!

Whether you plan to camp in your backyard, hit the road, or the skies – a vacation (I hope) is in your future! Photography and travel – well they are inseparable. As a well-traveled photographer, I can tell you that it comes down to a lot more than then just “taking pictures” when you get on the road.

Here are 10 tips to consider before you get out there!

Travel Tips for Photogs

1. Plan, plan, plan!

Where are you going, for how long, and what will happen while you’re there? Check local guides for any festivals, national events or really cool scenic spots before you get there. It never hurts to buy a map early. The more you know the better you can prepare.

2. Don’t forget your equipment.

It sounds obvious but it’s surprisingly easy to leave your camera charger at home – been there, done that. You’ll need batteries, memory cards, your charger (plus any world plug-converters if necessary) and your camera! Not to mention any cords or accessories you find useful. If you are traveling out of the country, or out to the country, these things can be hard to find or very pricey.

3. Tripod?

Think about this long and hard. Tripods are bulky and space consuming and usually mean you plan to spend a lot of your time taking photos. If you are flying anywhere or plan on doing a lot of walking on your vacation, you probably want to leave it at home. If you’re traveling by car and want to take leisurely landscapes and family photos then go for it! If you really want one with you, a table top tripod may be all you need. And here’s one for a point-and-shoot.

4. Carry your stuff with you.

Never put your camera equipment under the plane. No explanation needed I’m sure. Get a good camera bag that can hold your equipment comfortably and safely. They even make camera bags that don’t look like camera bags, for extra safety! The security detectors won’t bother your equipment. If you are bringing high-speed or professional film with you, then you probably know all about it and aren’t reading this :).

5. Carry your stuff with you!!!!

Get a strap for your camera and make sure when you hold your camera you have that strap in your hand or on your shoulder (across your body is great). If your camera is in a bag, but you are holding the bag strap … your camera can disappear and you might not notice. A reassuring bag strap doesn’t mean much when the bag is empty. Staying in a hotel? If you don’t need your camera when you go out, put your equipment in a room or hotel safe.

6. Memory cards, smaller may be better.

I recommend taking several low gigabyte/megabyte memory cards with you &, if you can, uploading them to your computer as often as possible. As a professional photog, I would never, ever shoot an entire wedding on one memory card. What if it was defective or damaged – or “knock on wood” I lost it. Instead I keep at hand several memory cards and switch them out throughout the day. It stinks, but you’ll feel much better if you only lose your trip to the Louvre – vs. – your entire European vacation. It happens, or rather, s*it happens – I hope not to you of course!

7. Remember the Golden Hour.

Early mornings and evenings when the light is shiny and “golden” are the best times for good photographs. Mid-day when the light is bright and everyone in your photos has their hand-shade up over their eyes – not so great.  Remember the light: you’ll have better photos and your family will think you’re a pro! If it looks good – it is!

8. Make sure you aren’t breaking the rules.

Museums, galleries and historical sites may have photography restrictions. If the sign says “no photos” they mean it! Don’t risk getting kicked out or having to delete your photos; it’s embarrassing. Also, learn how to turn off your flash before you go. Many places do not allow flash photography and no matter how hard you try your flash isn’t discreet. {You can always cover your flash with electrical tape if it really won’t shut off.}

9. Taking pictures of strangers

{This could be it’s own blog!} If you have a good zoom, you can always shoot from afar.  Or, buck up and just ask someone if you can take their photo! Always approach someone with your smile, not your camera. Smiles are the same in every language. Just smile, show your camera (keep it low, like you’re not shooting) point at it and say “photo?” If they decline, smile say “thanks” and walk away. Most people I’ve encountered have been wonderful and I wouldn’t trade those experiences for anything– the memory is better than the photo in most cases (and I’m pretty good at the photo part.)

10. Know your equipment.

If you just got your camera; or, if you haven’t used it in a while; or, if you use it all the time but really don’t know what you are doing  – figure it out before you go. I can tell you from personal experience that you won’t have a revelation on the road. The camera you can’t get to work at home won’t magically start taking better photos on vacation! Read that pesky manual. Or, better yet, get some hands-on experience in your backyard.

(11.) Take some time without your camera!

Don’t forget to put the camera down and take part in your fun! Photos don’t make memories; you do!

Have fun! *heidi

RED … mmm sushi!

If you’re hungry tonight, or any night in the future, do yourself a favor and visit RED {Refine Elegant Delicious} Sushi.

Better yet, make a reservation {608-294-1234}!

Located at 106 King St in Madison is an intimate, boldly designed restaurant. With only 16 tables and 12 bar seats; plus outside seating during the warm months; you’ll be hard-pressed to find a night where every seat isn’t taken. And, for good reason. RED Sushi has repeatedly received stellar reviews in all the local {and not-so-local} press; featured in Madison Magazine only weeks ago.

Last night, I took my camera {and empty stomach} and left with seriously good photos – and a seriously happy belly.

Not only do they serve the best Sushi in town, they also have the best servers. I should know, I work there Friday & Saturday. And, yes, you guessed correctly. I work there for the sushi. 🙂

Ask a photog – Tips for photographing kids

They say kids and puppies are the bane of show business. They aren’t wrong.

Here are a few pointers for keeping your sanity around the wiggly ones and getting some great photographs. Bring some wetnaps, a comb and the power of mom-spit: it’s going to be messy.

Shooting kids – with a camera that is

Tip #1  – know your kids

The first thing you need to do with kids is get to know them. Sit on the floor with them or run around the park and play for a while until they are comfortable with you. It’s good to have your camera with you, take a few shots and let them get acclimated to your presence.

Tip #2 – get down

Shoot on their level. Get low to the ground or shoot with extreme angles. You really want to avoid the “god” shot with kids, looking down on them from heaven. Go ahead and zoom in – we recommend getting really close to their face and getting interesting expressions … don’t forget to focus on their eyes. A good rule of thumb for checking focus in your viewfinder … check out the eyelashes. If you can see distinct eyelashes, you’ve got it!

Tip #3 – play

Shoot at a playground or outside where they can run around. Or if you’re in a studio, bring a toy or have the kids play with something they like. (You can keep those toys in the shot if it works).  Basically, you want them to distract their focus from the camera (and keep them entertained) until you’re ready. Jangling keys over your lens …. totally works.

Tip #4 – k.i.s.s {keep it simple … silly!}

Keep your equipment easy and simple. You’ll have enough to handle with your subject. If you have crazy equipment bring in a friend to help as a second pair of hands. Heck, bring a friend anyway.  Also, if you have a setting like “sports” or “child” use it. A fast shutter speed and a fast recycle time will help you get more shots. If you have a camera that “thinks” before it shutters, hold the shutter half way down until you see the shot you want to take – no lag time.

Tip #5 – go outside

Shoot outdoors when you can – the light is right. If you’re indoors try bouncing flash or opening a lot of curtains.  Always keep an eye out for the background. Trust me, I have seen my share of palm trees growing out of heads. Don’t let your children become victims to the ‘head pole’ menace. Use what you find outdoors in your shots too. Have your kids climb trees, or look through fence holes, or play on the swings … use these elements to frame your shot.

Tip #6 – plant those kids

Here’s a favorite trick for the wiggly ones. Stick those kids in a swing, a bucket or even (ala the dreaded Anne Geddes) a tire or flower pot. Sometimes you do what you have to do. And, hey if we have to take the Anne Geddes shot it’s not terribly lame – it’s cool … um, right?

Good luck!

*heidi

Happy Mother’s Day!

Happy Mother’s Day!

It’s been quite a week. I finally dug into an old chest of my mom’s photos – all gems.

What else could I do? I’ve scanned them all in, and I’m currently editing every single one. I can’t wait to make some new photo books of old treasures.

Here’s one of my favorites of my Oma, in honor of all flexible women everywhere!

After:

Before:

R.I.P. mom. I love you!

Annika’s First Communion

A mini-session with my beautiful friend Annika, who celebrated her very first communion yesterday!

Congratulations Annika!

On the way to church with her dad.

Ask a photog – blurry photos?

Because I’m a pro, I never forget to bring the proper equipment.

Okay, you got me … because I’m a pro, I have a lot of tricks up my sleeve! 😉 I always get the shot, even if I leave the tripod behind. Here are a few tricks for stabilizing your camera when you don’t have a tripod.

Honey I left the tripod at home

{Don’t forget that if your shutter speed is lower than 1/60th (maybe 1/40th if you are steady) then you will have an unfocused photograph.}

Tip #1 – increase your ISO

The easiest is the best. Can you change your ISO? An increase in ISO will let you shoot at a higher shutter speed thus eliminating the need for a tripod all together.

Tip #2 – hold your breath

If your shutter speed is between 1/30th – 1/50th you may be able to steady yourself. Check your camera settings, step wide (about two feet – make yourself a tripod), press the camera to your face, take a deep breath and hold it, then take your picture.

Tip #3 – find a friend

Find a friend! Have your friend step wide and step wide yourself. Get nice and close until the two of you almost create a quad-pod. Use your friend’s shoulder or head and press down with your camera. (Avoid hurting your friend.) Both of you should take a deep breath and hold it – release the shutter.

Tip #4 – find a flat surface

Find a flat surface nearby. Tree stumps or tree “Y’s” are useful – as are barricades, fences and balconies. You can use these surfaces to steady yourself or your camera as you take your picture. If you can let go of your camera use your self-timer.

Tip #5 – use your flash

Use your flash. The use of a flash “stills” action. This will work if you are taking pictures of people or something within about 3-10 feet of your camera. If you are taking a wide shot, or a landscape photograph, this won’t work for you.

Tip #6 – use your self timer

Use your self-timer whenever possible. The act of pressing the shutter shakes the camera and as we all know, every bit helps.

Tip #7 – buy a faster lens

If you’re fancy-schmancy SLR shooter like me, get your self a great fast-lens. My 50mm 1.8 works great, and quickly, in all light sources.

Good luck!

*heidi

{Nope – this image isn’t photoshopped. This photo was a team effort. How did we do this without a tripod? Easy, we followed some of the steps above. We each took turns holding the camera on a steady flat surface. Our camera was on “bulb” setting, which means the shutter stayed open until we manually closed it. Then, we each took turns “flashing” each other in front of the lens. Neat, right? Now, it’s your turn.}

The new family

Hello Baby Ian. You are so loved!

Here are a few shots from our recent full-session:

h&e got married …

Sometimes you need a little Photoshop.

I love this photo from our wedding day! However (as much as I love him) our friend Erick’s butt in the middle of our best photo, finally got to me. I didn’t have much to work from – but I think our new pic looks great! What do you think?

Ask a photog – get in the game

Sports, Camera, Action!

Tip #1

Sage advice … arrive early and stake out your spot. Look for good angles, overviews and sidelines of the game. It’s a great idea to stay at the corner of race tracks, or slightly above the basket/goal, to get interesting perspectives.

Tip #2

Check your camera settings. You’ll want to up your ISO (so you can catch the action). Keep your shutter speed as fast as you can (so you can catch the action). Don’t shoot in raw, these files take a long time to register. (again … so you can catch the action)

I had a professor once who photographed a greyhound race with a low shutter speed. After developing her film, she realized she had 36 beautiful pictures of the race track. The pups were faster than her shutter speed … so they were invisible!

Tip #3

Anticipate! Follow your  player and keep your eyes on the ball. A good photojournalist will get the ball (or a face) in every shot. Anticipate shutter lag if you have a more basic digital camera. Keep your shutter half activated so your camera is always ready-to-go.

Tip #4

Take a ton of photos. If you are shooting digitally you have no excuse. The more photographs you take, the better your chances of getting a great one.

Tip #5

Don’t forget the sidelines, bench, scoreboard or the fans. A reaction shot can be a safety net if you aren’t shooting what you like from the game.

Tip #6

If you are inside a gymnasium, and are close to the action, you may be able to use your flash. You’ll probably need a professional DSLR and decent flash to get this to work. There are two important flash rules to remember: always make certain you are allowed to use your flash, and never distract the players (this can be very important in games like golf).

Tip #7

Get in the mindset of a player; practice, practice, practice.